PUBLISHED
October 17, 2024
6 min read
A designer’s guide to 3D printing in fashion
From creating models to choosing materials and developing your craft, here’s what we learned from zulu kuki’s 3D printing masterclass
Over the last decade, luxury fashion has been a playground for 3D printing. From Iris Van Herpen’s long-running love of 3D printing in haute to Fanrui Sun’s ultramodern work experimenting with metals and, just this month, Coperni’s lusted-after Swipe Bag reimagined through a new “gravity-free” process, boundary-pushing designers are using the tech to create masterpieces.
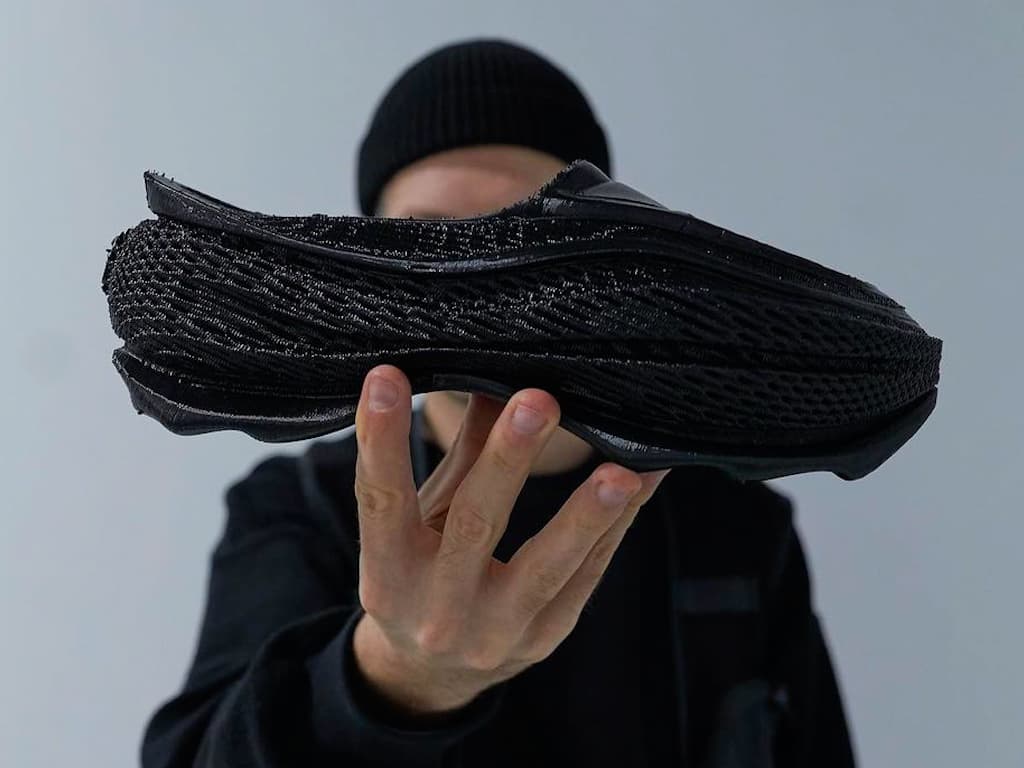
With that in mind, we invited multidisciplinary artist zulu kuki, a pioneer in designing footwear for 3D printing, to host an exclusive masterclass for the SYKY Community. From exploring different types of printers to creating digital assets and bringing them to life in 3D, here’s what you need to know to get started with your own creations.
1. Know your printers
Choosing the right printer is step one. zulu kuki’s personal preference is Fused Deposition Modeling (FDM) – specifically the Artillery Sidewinder X2 – which extrudes materials layer by layer from a nozzle to create the object. He also recommends FDM printers for designers new to 3D printing because they're “Simple enough to start your adventure”. Small and safe to use at home, they’re less expensive than more industrial tech like Stereolithography (SLA) and Selective Laser Sintering (SLS), while being able to handle a range of materials.
2. Prepare for success
Like any design practice, 3D has its own design principles. Understanding these and prepping your designs will get the best results. zulu kuki mentions he spends up to 90% of his time on development and only 10% on actual printing.
The designer's first rule of creating models is always to design closed objects – no gaps. zulu kuki uses Blender, which is free, but encourages you to use whichever software you feel most comfortable with. It’s essential to use software that can export the correct STL format.
After designing comes slicing – converting your 3D model into a G-code for the printer. In this program, you will determine infill patterns and densities that impact the final piece's overall quality, weight, cost, and functionality, as well as understand the layout of the support structure. For slicing zulu kuki uses free UltiMaker Cura, but there are plenty of others on the market
“ The final product isn't about the print itself; it's about the possibilities that open up afterward.”
3. Materials
Once you've got design principles down, you’re onto material selection. While current FDM printers mostly use thermoplastics, there’s a wide range of materials for filaments (the spool of material used in 3D printers) and new ones are developed constantly. Before selecting your materials, zulu kuki recommends considering the desired properties of your final piece. Do you need strength, flexibility, durability, a shiny surface finish? The two materials our masterclass host uses most for his footwear are:
- PLA (Polylactic Acid) is biodegradable, easier to work with thanks to a lower melting point, and available in a range of colors and types.
- TPU (Thermoplastic Polyurethane) is flexible, durable, comfortable, and often used for shoes and other wearable pieces. The designer uses TPU for his own footwear creations, specifically mentioning Recreuse’s foamy-feeling Filaflex.
4. Experimenting and prototyping
Once you’ve got your material, it’s time to create. Like any art form, you’re not always going to get it right first time. zulu kuki considers prototyping and experimentation essential to discovering new techniques and carving out your own style. “By testing… designers can iterate on their designs, improve their skills, and ultimately produce higher-quality and more successful prints.”
You can experiment at every stage of the process – from the materials you choose to varying infill densities or nozzle temperatures during the printing process. For prototyping, the designer recommends using PLA, which is cheaper than other materials, to check the shape and other visible design aspects. If you’re into physical design, incorporate it into your practice. zulu kuki uses clay to create physical models of his shoe designs to get a sense of shape, form, and functionality before 3D printing.
5. The final piece
Once you’ve printed your piece, you might want to stop there. But for zulu kuki, the raw print is often the start of creating something more complex through post-processing. “The final product isn't about the print itself; it's about the possibilities that open up afterward.”
Techniques like sanding, painting, and assembly can be used to refine the surface finish, add color, or integrate 3D-printed elements with other materials. The designer points to his recent collaboration with Stitchrays, which combined traditional handicrafts like crochet, knitting, and hand sewing with 3D printing technology across a 16-piece collection including a bag, balaclava, bolero top, and more.
Get access to SYKY masterclasses, industry exclusives, and more by becoming a member of our community. Sign up here.